Just a quick note from the road (we are heading to Portland for Brewfest! YAY!)
Nate and I will be participating in the UNDERWEAR AFFAIR here in Los Angeles next Saturday to help raise funds to fight prostate, ovarian and all other "below the belt" cancers.
To donate to our team click HERE donations of $1, $5 and $10 are VERY helpful, as it adds up fast and every dollar counts!
For more info on this awesome event visit the home page HERE
Thanks!
.jpg)
Thursday, July 24, 2008
Sunday, July 20, 2008
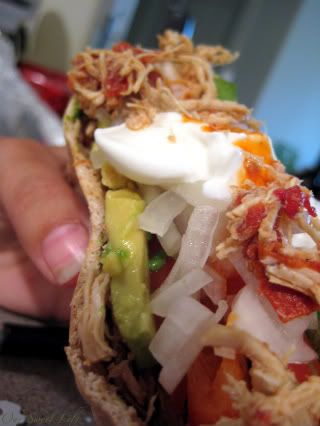
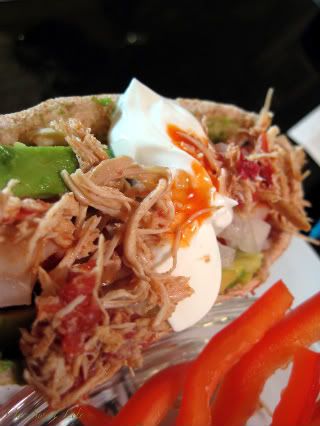
Crockpot Chicken "Tacos"

I looooove my crockpot- much like all my fun kitchen goodies that are there to make life easy livin'.
I threw this together on a day off mid-morning, so I didn't have to mess up the kitchen making dinner after I cleaned all day. I did totally forget we had no tortillas- so I served them in whole wheat pita instead- we'll do it with tortillas next time~
This recipe includes an AWESOME recipe for homemade taco seasoning that will totally replace the urge to buy packets- just mix it up once in a batch and keep in an airtight container for up to 1 year!! 2 1/2-3 Tablespoons = one "packet" from the store.
3 T. chili powder
1/2 tsp onion powder
1/2 tsp dried onion flakes
3/4 tsp garlic powder
3/4 tsp oregano
1 tsp crushed red pepper flakes
1/4 tsp cayenne pepper
1 tsp paprika
1 1/2 T. cumin
2-2 1/2 tsp kosher salt
1 T. black pepper
mix it all together!
Onward to the chicken...
about 2 1/2 T. of the taco seasoning mix or 1 packet
15 oz LOW SODIUM chicken broth
1 14.5oz can diced tomatoes and liquid
4 boneless skinless chicken breasts
1 avocado
1/2 chopped sweet onion
1/2 chopped or sliced red bell pepper
Non-fat sour cream
HOT SAUCE
Soft taco size tortillas or pitas
In a large bowl or bigole measuring cup pour the chicken broth in, and use a fork to whisk in the taco seasoning mixture (add a few dashes of hot sauce if you want!)
Spray the slow cooker with non-stick cooking spray.
Open the diced tomato can and pour all contents over the bottom of the slow cooker.
Lay the chicken breasts on top of the tomatoes and pour the broth/seasoning over that.
Cover and cook on LOW for 6 hours- chicken should fork apart easily.
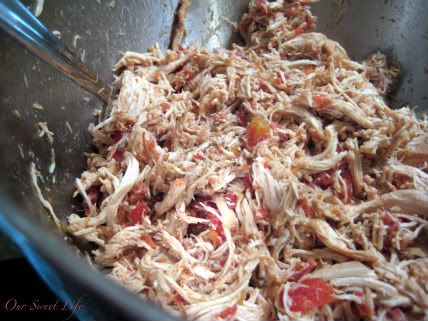
Use a slotted spoon to remove the cooked chicken to a large bowl and use 2 forks to shred it up.
Use the slotted spoon to get all the diced tomatoes out of the slow cooker and add to the shredded chicken. Then grab a large cereal spoon and add about 4-6 spoon fulls of the liquid from the slow cooker to the shredded chicken bowl and stir it all up!
As I said, I totally forgot to pick up tortillas at the store so I served these in a 1/2 toasted whole wheat pita.
Top with red bell pepper, avocado, onion and a wee bit of fat-free sour cream (and, of course, a dash of hot sauce!)
Thursday, July 17, 2008
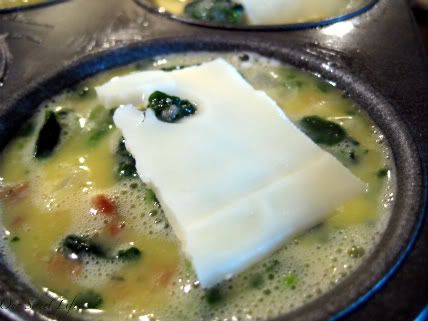
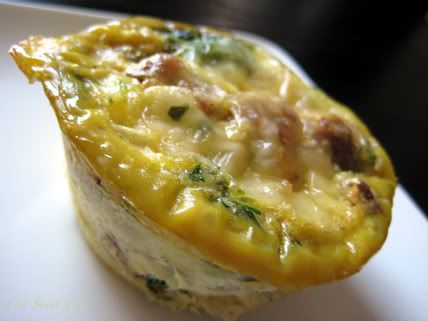
Breakfast to go! Lil'omlette cups~

I get pretty bored with weekday breakfast pretty quickly. I mean, how much SpecialK and plain oatmeal can one gal eat?!? So I love making these from time to time to mix it up a bit and have a yummy portable egg breakfast that is also low in calories and easy to heat & enjoy!
My favorite way to do this is make a batch on Sunday evening, then have 2 of these little pups for breakfast 3 days the following week...
Makes 6 lil'egg-muffins
5 eggs
1/4 cup non-fat milk
1 piece non-fat cheese
1/2 c frozen chopped spinach
1/3 c frozen diced onion
3 frozen veggie sausage patties- thawed and chopped into bits
Dash of hot sauce
Pinch of salt & pepper to taste
Spray a 6-muffin-tin with non-stick cooking spray.
Whisk the eggs, milk and hot sauce. Then add the onions and spinach, and stir in the chopped up veggie patties until all mixed up. Use a ladle to fill each muffin cup almost to the top (they do rise just a bit). Tear the cheese into 6 equal pieces and float a piece on top of each egg-cup.
Bake at 375 for about 45 minutes (the egg will appear totally cooked and look a bit golden when finished).

Serve with MORE hot sauce!! (the above mix ins are just one of a zillion ways to make these,use veggie bacon, a little dollop of goat cheese, fresh herbs- anything you can think of!
Monday, July 14, 2008
Nicole's Famous CRACKers
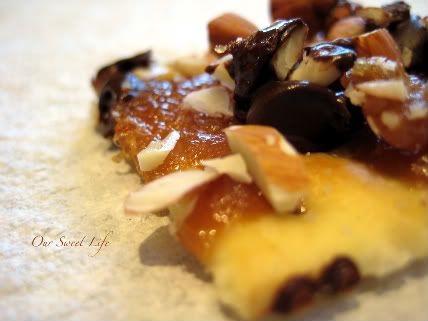
A co-worker brought these lil'devils in to work a while back and I (our whole office) LOVED them!!! It is a super easy, super budget-friendly, great-take-to-a-party treat, so (with Nicole's permission) I had to share~
We re-named them CRACKers because, as you will find, these are completely addictive and I DARE you to only eat one!
THANK YOU NICOLE for letting me post this for everyone to enjoy!
What you'll need~
1 stick of butter
1/2 cup packed brown sugar
a package of saltine crackers
chocolate chips
any nuts chopped or crushed (pictured with almonds, MY FAVORITE!)
Preheat the oven to 400. Get a cookie sheet out, cover with foil and lay crackers out all over the cookie sheet. Take the stick of butter and brown sugar and melt together in a small pot over medium heat don't stir until it is all melted!!, now wait for the sugar/butter to caramelize (you will notice big bubbles)- once that happens, remove the pan from the heat and use a spoon to drizzle the caramelly goodness all over the crackers. Then sprinkle the crushed nuts on top.
Bake for 5-7 minutes. Take the crackers out and IMMEDIATELY sprinkle the chocolate chips over them, then transfer off the cookie sheet to cool before the chocolate chips re-harden.
Friday, July 11, 2008
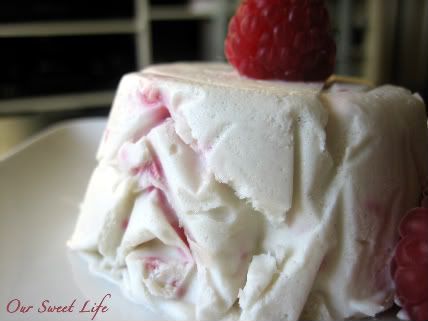
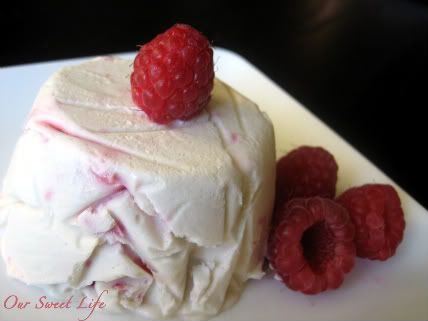
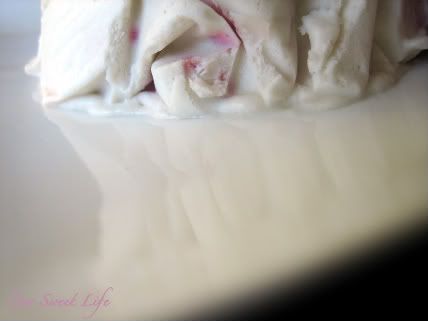
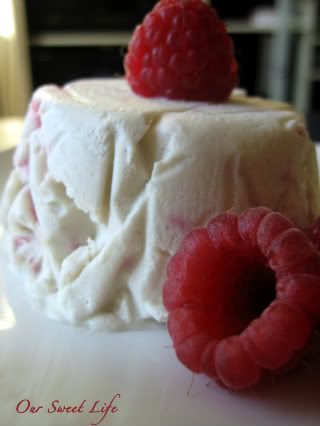
Raspberry Semifreddo
I got a great Christmas gift this past Christmas from my brother & sister-in-law; The Silver Spoon, Italian Cookbook.
Since we were making a tanker-truck of a dinner, the homemade lasagna, I wanted to do some thing fruity, cool and creamy for desert and this was a perfect marriage of all those elements.
This recipe makes a TON of semifreddo, enough for a big loaf pan full (as the recipe says) AND 6 individual muffin tins (which made for pretty serving!)
Raspberry Semifreddo
Semifreddo al lampone
Source: The Silver Spoon Cookbook
6 eggs
1 1/4 cups super-fine sugar
1 1/2 cups raspberries
3 cups heavy cream
Whisk the eggs with the sugar in a heatproof bowl over a pan of barley simmering water until thickened, then remove from heat and continue whisking until completely cool.
Mash the raspberries in a shallow dish.
Stiffly whip the cream (I used our stand mixer to whip the cream until it formed stiff and glossy peaks. Slowly combine the cream, egg mixture and raspberries by stirring gently.
Line a rectangular loaf pan AND a 6-muffin muffin tin with plastic wrap, pour the mixture into the loaf pan and spoon it into the muffin tin and smooth the surface.
Freeze at least 4 hours to overnight.
To serve, turn the pan upside down to release the semifreddo and remove the plastic wrap.
Thursday, July 10, 2008
Homemade Lasagna
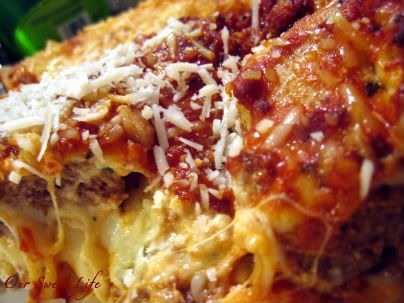
It definitely can't be something you eat every day, but when we do eat lasagna, it's best when it's made from scratch through and through.
Pasta
We used this recipe from the
Silver Spoon Italian cook book and doubled it~
Nate usually makes it solo with out a recipe- he just knows when it's right!
p.268
Fresh Pasta Dough (Basic Recipe)
1 3/4 c. all purpose flour (plus extra for dusting)
2 eggs lightly beaten
salt
Sift the flour and a pinch of salt into a mound on the counter. Make a well in the center and add the eggs. Using your fingers gradually incorporate the flour then knead about 10 minutes (you can also use a stand mixer with dough hook attachment.
Add a bit of flour if the dough is too soft or a bit of water if the dough is too firm. Shape the dough into a ball and let rest about 15 minutes.
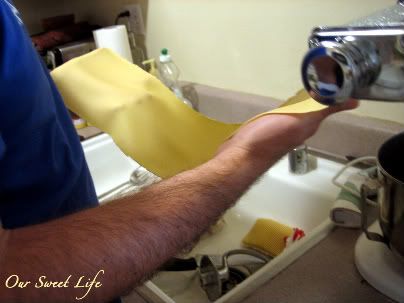
We then broke it into smaller pieces and used the attachment to our stand mixer to roll out the sheets.
Sauce & Meatballs*
Meatballs & Sauce from ALL RECIPES
*This is a good basic foundation for a tomato-based pasta sauce, that you can add spices, etc. to and make it yours...
We use Nate's family recipe- and you gotta marry one of us to get it! (well, not me or Nate of course, but you catch my drift.)
Cheeeeesseee!!
1 large container of ricotta cheese, 1 big block of top-notch mozzarella (cut into 1 or 1/2 inch cubes), and about 2 cups shredded Romano/Parmesan mixed up, and about 1-2 T chopped parsley (fresh or dried) use more if you are using fresh... and 1 egg-
Mix it all together with your hands in a BIG bowl!
Assembly
Once the sauce is finished pull the meatballs out onto a plate with a slotted spoon (we threw some spicy Italian sausage, 1pkg) into the sauce too- so, same for those- on the plate with the meatballs. (let them cool while you roll out the pasta.
Using the pasta roller attachment to a stand mixer, roll out flat sheets of pasta (make each sheet the aprox length and about 1/2 the width of the pan you are baking it in).
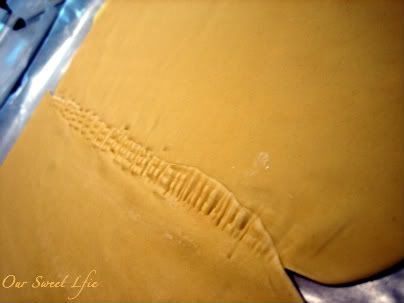
Place next to one another on a sheet of floured wax paper, so they overlap a bit- fork together the overlap to make it one sheet.
Cut the meatballs and sausage into slices about 1/4-1/2 inch thick.
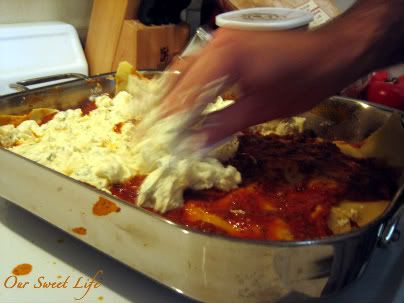
In a large bowl mix the ricotta, mozzarella, 1/3 of the Parmesan/Romano, a few pinches of parsley, the egg, and some salt & pepper (we always do this mixin with our hands, but it can be done with a wooden spoon I suppose)
Spray a deep baking dish (we actually have an All Clad pan that is called a lasagna pan- this was the first time I used it correctly, I guess!)with non-stick spray. Add a big spoonful of sauce and spread out thinly over the bottom.
Place the first "sheet" of pasta in the pan.
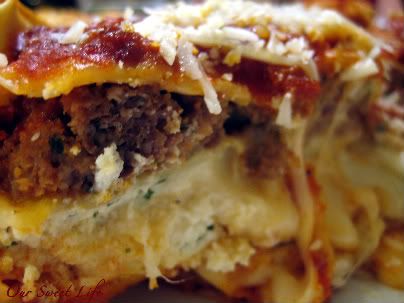
Spread some sauce out on that layer, then place slices of sausage across the sauce to make a layer, spread some of the cheese mix on top of sausage, then lay another sheet of pasta over that.

Spread a thin layer of sauce and then spread a generous layer of cheese and put the 3rd sheet of pasta on top of that.
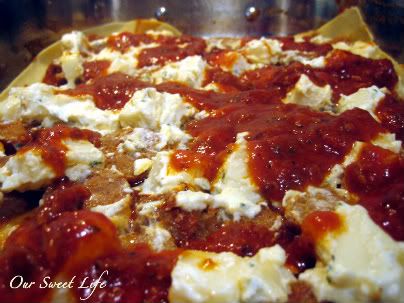
Now, another layer of sauce, then place the slices of meatball in a layer and coat with a thin layer of cheese.
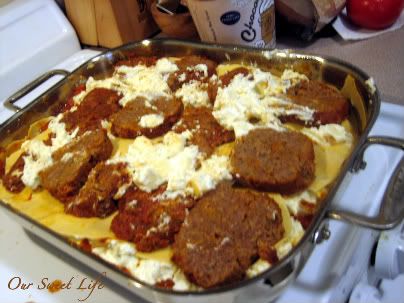
Lay the 4th sheet of pasta over that and top with a thick layer of sauce & sprinkle with remaining shredded Romano/Parmesan.
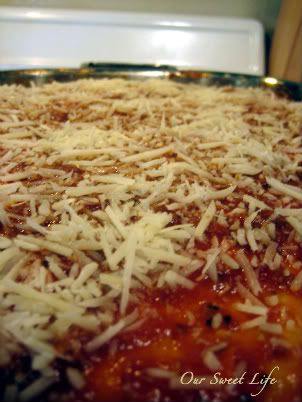
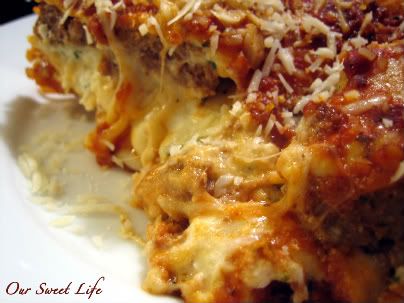
Bake at 375 covered with foil for 35-40 minutes, uncover and bake 20 more minutes.
Let it sit about 10-15 minutes before cutting and serving.
Serving suggestion; I served a small caprese tower with this dish.
Roma tomatoes, fresh basil leaves, olive oil and sliced mozzarella cheese ( make the slices about a centimeter to a centimeter and a half thick and to shape them all pretty, use a 2-inch diameter biscuit cutter if you got it!)Use a little plate and start with a piece of cheese, then a basil leaf, then tomato, basil leaf, cheese, tomato. Drizzle with olive oil, top with a bit of fresh cracked black pepper.
Then we had a lil'spinach leaf salad
Baby spinach leaves, fresh raspberries, slivered almonds & shaved hard aged Parmesan cheese.
Dressing;
Olive oil
Balsamic vinegar
Honey
Salt
Pepper
Dijon Mustard
2 smuhed raspberries
Whisked together
Some how in the midst of serving ourselves and our 4 guests (and being out of my blogging habit), much like the photoless dip in the weenie post- No pics of these two, but wanted to share anyhow!
Tuesday, July 8, 2008
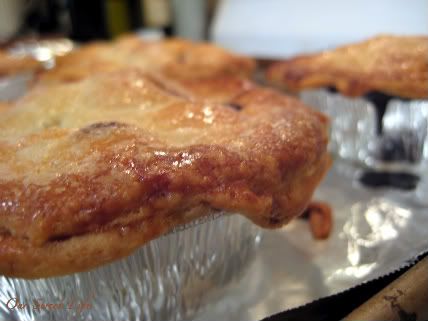
Tuesdays With Dorie~ Double Crusted Bluberry (Bluecherry) Pie (s)..
It will still be Tuesday for about an hour here in LA, so I made it! YAY!!
I couldn't resist this weeks TUESDAYS WITH DORIE pick, brought to all of us by Amy of SOUTH IN YOUR MOUTH! Amy chose Dorie's Double-Crusted Blueberry Pie, from "Baking; From My Home to Yours" By: Dorie Greenspan, a fabulous baking group that is baking and eating our way through this SENSATIONAL book. My copy is now pretty evenly coated in a very thin layer of sugar, flour and a few vanilla extract stains here and there. Hop on over to Amy's blog if you are still waiting for your book to be delivered or if you're at work and need the ingredients for your grocery list before heading home. She has the whole breakdown, a beautiful pie and a great story!
Back to the pie....or in this case pieS. I decided to make mini-pies instead of one whole pie. This makes it a little easier for Nate and I to stay on our health kick and share the pie love with our co-workers. While we were grocery shopping this past weekend I came across disposable "pot-pie" pie tins and figured that would be perfecto!
I picked up a whole mess of fresh, giant blueberries, and got to pie makin'!
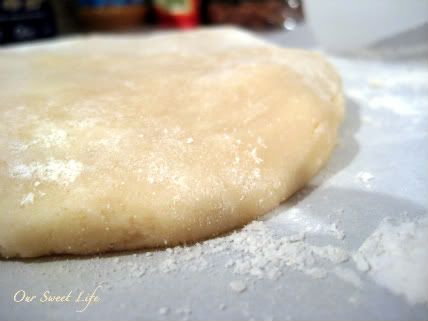
First I made the double crust (a double batch of Dorie's go-to pie crust that is the BIZOMB.) The only change I made is using the plastic "dough" blade on the food processor....
While the dough was chillin I cleaned up my flour mess and gathered up the filling ingredients. I could find one of the containers of blueberries, but where the heck was the second container?? I tore the fridge apart, checked my grocery receipt (rang up for TWO containers of blueberries) and had no luck turning them up. I was not giving up on the pie making (and was not going back to the store) so took some filling liberty on this recipe.
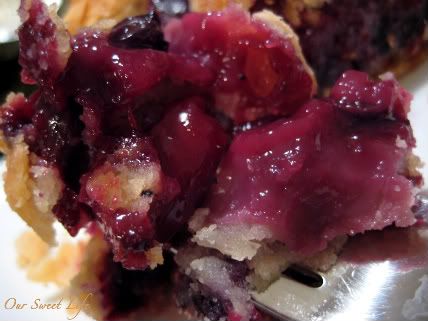
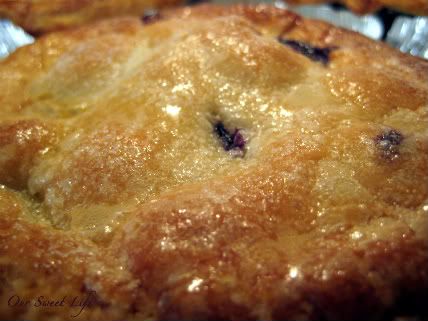
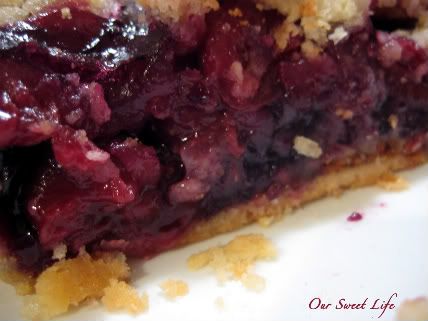
I used 1 pt of fresh, delicious blueberries and about 1 to 1 1/2 cups fresh cherries, pitted (we drove to Tahoe last weekend and scooped the cherries up on our long Sunday drive home through the farm lands of Cali).
I kept everything else about Dorie's filling recipe the same (and crossed my fingers!)
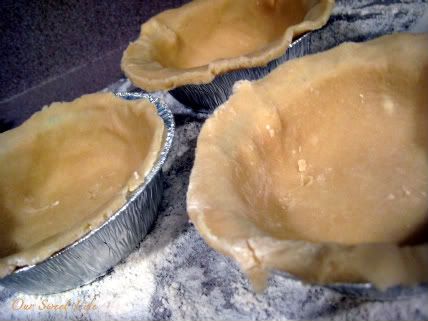
I rolled out the first disc of dough and it made enough crusts to fill 5 of the lil pot-pie tins (which I buttered BIG TIME!).
Then I tried to be as even as possible with the filling.
I rolled out the second disc, used one of the un-used pot-pie tins as a stencil and cut out my top layer of crust, sealing each little pie up~
I baked the 5 pies 25 minutes before lowering the oven temp a bit, but then for about 35 minutes- so in the end the same cooking time.

These were a HUGE hit!! The flavor combination was absolutely beautiful, and the pies were adorable! Nate and I cut one in half and shared it (perfect amount of decadence)then he had a little more...
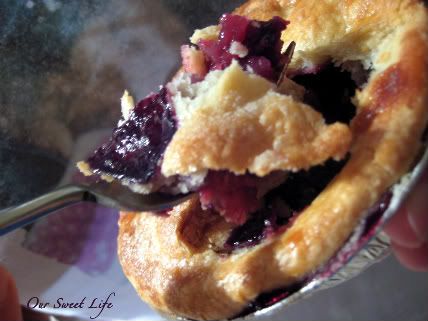
These were fun to just dig into with a fork like we did at work today! I loved it as Blucherry Pie, but think it would be brilliant with just the blueberries~
This recipe was DELICIOUS and a most definite keeper!
PS the other container of Blueberries was in my freakin trunk! (I'll check there SOONER next time!)...
Wednesday, July 2, 2008
Running way behind, but I have CHEESECAKE!
Ok, so I have got a TON of catching up to do!! As you know, I fell off my blog-wagon back in April, with work, life and just WAY too much going on around me, I have stacks of drafts in my little blog-post-storage!! So, it's time I start getting caught up!!
This is actually my DARING BAKERS challenge from APRIL! (can you believe that, totally embarassing!) To keep it honest, I did not complete May's Opera Cake Challange, and I am doing my June goodness THIS weekend, but then I'll be all caught up, in the DB department at least!
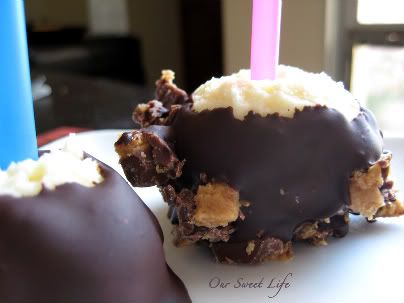
These were probably my absolute favorite DARING BAKERS Challenge so far (since joining in December of 2007)

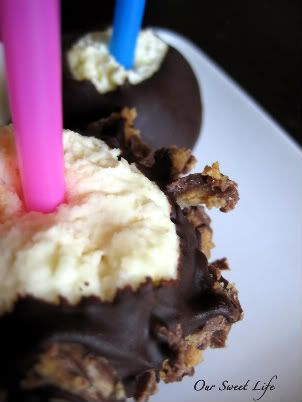
This challenge was chosen by Deborah of TASTE and TELL and Elle of Feeding My Enthusiasmshere are the links to their cheesecake pops, where you can find the recipe and many glorious versions of this super crowd friendly desert! This recipe comes from a must-own book of deliciousness, Sticky, Chewy, Messy, Gooey by Jill O'Connor.

This was not too difficult, was SO impressive, and will be a go-to party desert for me for the rest of my life!! You can really go in any direction with these as far as decorating them- dark chocolate, milk chocolate, sprinkles, nuts, etc...the possibilities are endless!!
I did end up cooking mine about 15-20 minutes longer than the recipe called for, let it sit for 15 minutes with the oven off and door closed after cooking was complete.
I used straws from the grocery store that I cut with kitchen scisors, and mine are dipped in dark chocolate (some rolled in cut up reeses p.b. cups- but that didn't work too well, but well enough I think I'd just go crushed nuts & sprinkles next time...)

Subscribe to:
Posts (Atom)